
|
Optimizing Game SettingsMost players on World of Tanks jump right into battle using the default game/graphic settings which the game developers have dished out. The more adventurous ones may play around with the preset Graphics Quality, such as High, Medium, Low or use the Auto-Detect feature and then leave it at that. In reality, there’s really much more to optimizing your game settings than using the crappy defaults. For the serious gamer who wants the best performance possible for in-game battles, realistic graphics such as smoke, barrel flash, foliage only serve to restrict visuals and lower frame rates. These are contradictory for an effective battle gameplay. In this issue, we’ll explain on how to optimize your game settings to get the best battle performance. Game Settings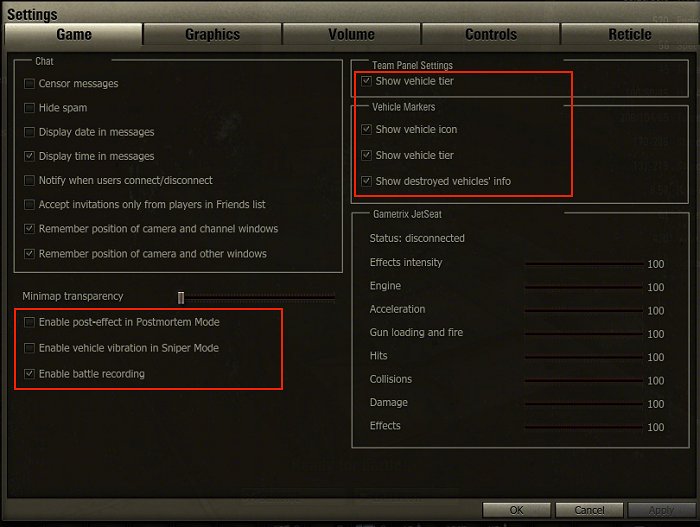
To open your game settings, press Esc and click on Settings. For the most part, you can select your preferences without any impact to game performance - but for optimized battle settings, I’d like to draw your attention to those shown in red boxes above.
Enable post-effect in Postmortem mode – OFF.
Enable vehicle vibration in Sniper Mode - OFF.
Enable battle recording - ON.
Show vehicle tier - ON. Graphics Settings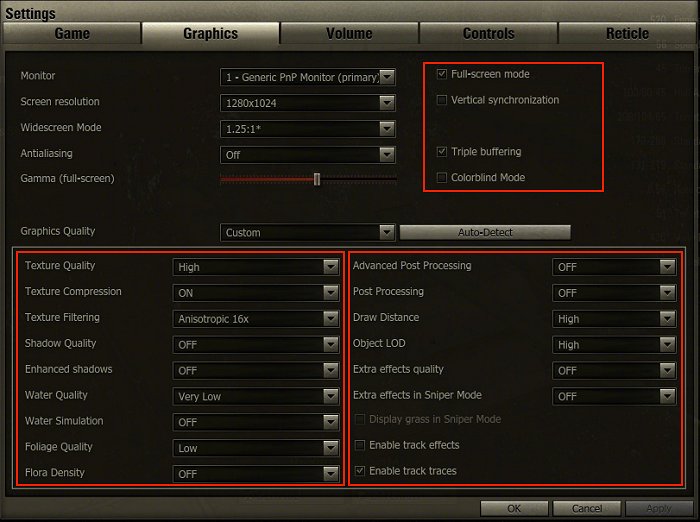
Full-screen mode - ON.
Vertical Synchronization - OFF.
Triple buffering - ON. Colorblind mode - OFF.
Texture Quality - HIGH. 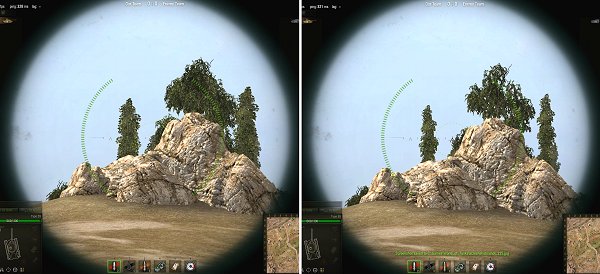
The Low Texture has rendered the tree leaves as bushy blocks (left picture), compared to the High Texture which is so much clearer (right picture). Texture Compression - ON.
Texture Filtering - Anisotropic 16x.
Bilinear - Trilinear - Anisotropic 2x - better Anisotropic 4x - Anisotropic 8x - Anisotropic 16x - best
Shadow Quality - OFF.
Water Quality - VERY LOW.
Foliage Quality - LOW.
Advanced Post Processing - OFF. Post processing is the process of combining individually rendered objects to apply a more natural look. This natural look causes distant objects to appear blur as the eyes can only focus on one point in space, and the rest appears out of focus. This naturalism is quite annoying in games because it causes many objects to become blur. You should set this to Off. 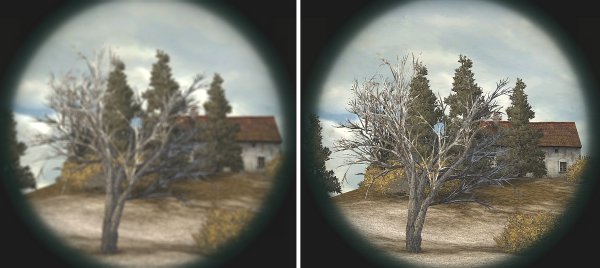
The two images above show the effect of Post Processing. The left blurry image has Post Processing on, whereas the sharper right image has Post Processing off. Post Processing - LOW.
Draw Distance - HIGH. 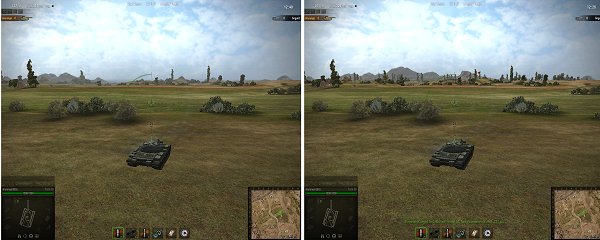
Notice you can see the hills, tree, bushes, and flag in the distance when set to high.
Object Level of Detail - HIGH. 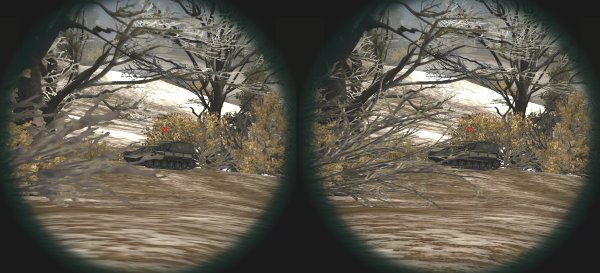
Notice the branches on the left are so much clearer with high level of detail. More than just pretty graphics, this detail enables you to see better.
Extra effects quality - OFF. Display grass in Sniper Mode - OFF.
Enable track effects - OFF.
Enable track traces - ON. Reticle Setting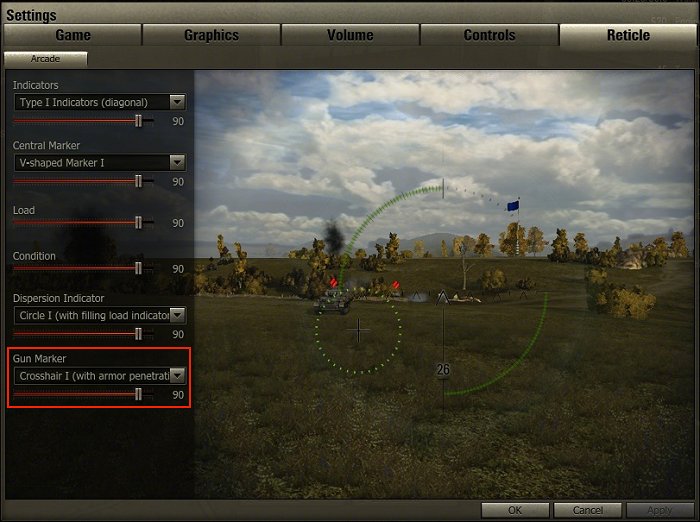
Finally we come to the reticle setting. Reticle simply refers to the pattern in the eyepiece of your gun sight. Its also commonly referred as the crosshair. For this, most of the settings are preference based, and don’t really affect game play – except one.
Gun Marker - Crosshair I (with armor penetration indicator). Often times you’ll be peering at distant enemy tanks, or through bushes. With obscured vision, its difficult to clearly see modules, or aim at armor weak spots. This color changing crosshair is a great guide which WW2 tankers would have given their favorite toe for. 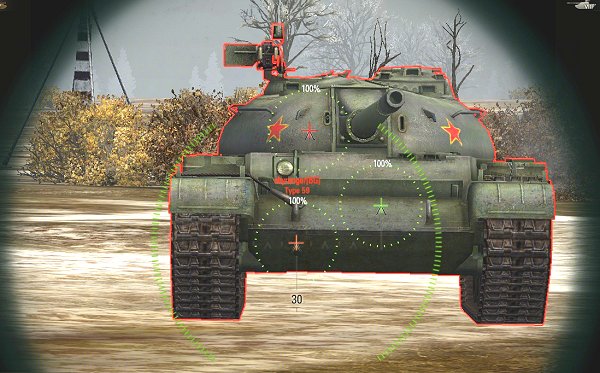
Notice in the image above, how the crosshair changes color from red, orange and green depending on where the gun is pointed, showing the penetration potential.
Home
Game Interface
Game Currency
Before Combat
Combat Strategies
Team Strategies
Gun and Ammo Database
WoT Performance Analyzer Tool Tank & Weakspots Analyzer Tech Tree WoT Renders WoT Wallpaper Achievements Crew Voices Game Music Game Map Glossary Panzer Ranks System Requirements About This Website Contact Us Other Sites Copyright 2013 WorldOfTanksGuide.com |
||||||||||||||||||
